Sunday, June 9, 2013

EyeO Recap[0]

    My brain is COMPLETELY full.  I mean, honestly I don't even know where to begin, there were so many great presentations, and so many awesome conversations about random cool things, and so many good ideas tossed around, and...I took a bunch of notes on individual sessions, which I'll toss up on the google drive at some point, maybe in about an hour when I go sit down for lunch (aside, MSP is one of the most connected airports I've ever been in.  Seriously SFO and SJC, step up), and once some of the noise dies down I'll put up my actual thoughts.  I'd started some posts about each day, but eventually it just got to the point where I couldn't digest things fast enough to come up with coherent thoughts on a nightly basis.  Granted, there were open bars involved too, but i didn't really stay out that late, something I plan to remedy next year.


This guy is a genius, listening to him talk, you can totally see how he would build something like Hypercard. Photo by Charlie Cramer

    If I had to pull out one takeaway right now, Bill Atkinson (of Hypercard fame) said it best.  Learning to code is cool, but take a different approach.  There's the approach that says "I want to learn how to code", and there's the approach that says "I want to do something cool, and I'll need to learn how to code to make it happen", or alternately expressed, forget about how you want to do something and focus more on what you want to do and why you want to do it.  That's not to say that tools, frameworks, languages, etc don't matter, but I've always held that application is the best way to learn something, learning through doing, learning through projects, that sort of thing.  So often, I hear people say, well, why would I need to learn to code or, ok, I know some basics, but what do I do next?  Answer that problem first, and learning to code becomes easy.  Learn the things you need to learn for this project, then build off of them for the next project (or shoot off in a different direction and learn new things, either way is a great approach).  But don't get so caught up in learning how to code or learning every particular of a language, framework, paradigm, or process that you forget to make something beautiful.  As I ranted to a co-worker a little while back "There is no perfect tool or SDK/API.  Unity, UDK, Max, Maya, Cinder, ofx, processing, Windows, Mac OS, they ALL suck."  But I'm going to append that with they all make beautiful things.  So quit whining and make cool shit.

    My other takeaway is that Memo Akten is in fact a machine, but his talk was probably the most personally inspiring.  More on that later, but suffice it to say, I used to think I was crazy until I heard his talk.

    EyeO this year definitely struck me as more about experience than technology.  I think this is both good and bad.  Good because experience is really what matters at the end of the day, bad because so many people now are talking about experience, moreso than the people building experience.  It would be really sad to see EyeO become a glorified UX/HCI conference, and I really hope they keep to the trend of only recruiting speakers who have actually MADE stuff.  I don't see that trend changing, and I really hope EyeO continues to feel the way it did this year.  Sometimes it takes a long journey fraught with setbacks, delays, time spent wandering the wilderness, time spent off the trail for a bit, or time looking at the map trying to remember where it was you were going in the first place, before you reach home.  I'm not there yet, but after EyeO this year, I feel like I'm passing the last few mile markers.  GDC had been home of sorts for too many years, really looking forward to this new place.  It feels real.

Thursday, June 6, 2013

EyeO Festival, Day 0

    I'm not even going to try and quote Zach Lieberman's excellent keynote, it'll be up on Vimeo anyway.  I can't do it justice, but he really did say some things that lit a fire under me, especially when he called out people who spend their time building corporate demos for tradeshows and posited that CEOs shouldn't be the ones onstage telling the world what the future's going to be.  It's true, and I urge everyone, especially any of my colleagues in Perceptual Computing to keep an eye on Vimeo for when it's released (or just my facebook, since I'll be posting and reposting it probably a few times an hour).

    Watching the Ignite talks at EyeO tonight, I realized a few things:
  • I'm total weak-sauce for not submitting an Ignite talk, since I wouldn't have been the only first time speaker.
  • I haven't really given a talk on anything I REALLY care about since I spoke at Ringling.
  • If I want to do an Ignite talk next year, I need to start prepping now.  Holy jeebus those speakers were GOOD.
In fact, the last sorta public speech I gave, I was doing the exact opposite of that, i.e. I was being made to champion a cause I absolutely didn't believe in and tell a story that...wasn't really a story.  Seeing all those folks just KILL IT during the Ignite presentations really reminded me of what I love about public speaking, and that's telling stories I care about that give me an opportunity to connect with my listeners and inspire them.  I need the opportunity to do that again because, "Without Change, Something Sleeps Inside Us and Seldom Wakens."


I feel like I've been sleepwalking for the last month at least

    But enough positing!  There was actual content today, so let's talk about interesting things instead of listening to me spew opinion.  The first of two workshops today was a great intro to D3 from Scott Murray.  I'd been looking at d3 earlier this year and getting to play around with it reminded me of why I liked d3 in the first place and why I wouldn't mind doing a bit more javascript work.  I don't know if it's proper to say I want to do more javascript work, I think it's more that there are certain libraries that let me do certain things that just happen to be javascript, so really what I want to do is more work with said libraries and if that means a particular language, I guess that's it.  I mean, if it were about a particular language/toolkit's available libraries, by that logic I'd be much more of an ofx fan than a Cinder fan, yeah?  I'm really excited about the idea of using d3 and Three together, hadn't really thought much about that but the idea popped up today.  Could be fun.


It's kinda nuts how easy it is to make these in d3, even with animation and interactivity

    The second workshop was an applied math tutorial from the man himself, Memo Akten.  This course just reinforced to me how we really need to rethink the way we teach math in this country.  It also confirmed my suspicion that Memo is a machine.  Seriously, the way he talks about numbers and math, you can just tell he processes all that stuff differently than normal humans do, like...he SEES in linear algebra and trig.  I'm totally jealous, hopefully it'll come with practice.  The two things that I feel made this class work were a) the fact that the information was presented in such a way that concepts either built on top of each other or were otherwise shown in relation to each other and b) PRACTICAL EXAMPLES!  Honestly, I've always been comfortable-ish with Trig, but seeing some practical examples, like projector-to-camera mapping, for example, really just locked it in.  I put some notes online, they're probably only useful to me, but you're welcome to take a peek anyway: EyeO 2013 Applied Math Notes


...they're useful and make sense!

    Day 0 wrapped up with Zach Lieberman's amazing keynote and an incredible round of Ignite talks.  I really can't do them justice, so keep checking Vimeo for them, they're all worth watching.  Onto Day 1 for talks and hack-a-thons!

Tuesday, June 4, 2013

Eye-O Festival, Day -1

    I came to a really interesting realization this morning over some incredibly hot coffee (plus, Dunn Bros coffee on 15th? Yes, just, yes) that this may be the first time I've gone to a conference where I'm actually NOT interested in networking.  I mean, don't get me wrong, it'd be great to get my name out into the space a little, but I'd rather do it through real work.  Putting a few samples on github doesn't really count as compelling work, no matter how extensive the development might be (for the record, it's not much at this point).

    In all honesty, my interest lies in mapping the space, and again, not for a networking standpoint, I'm very interested just to see who's doing what in general, mainly because I think all this stuff is really cool (oddly enough, what brought me to intel).  I think if I had meant to network really hard, I would've tried a bit harder to make sure I brought business cards, so maybe my brain just knows things that I don't.  Yeah so, really excited to get a look at what people are working on, and just spend a few days writing code.  Workshops start tomorrow, first up D3 with Scott Murray, followed by Applied Math with the man himself, Memo Akten.  Mind preparing to be...expanded at least, probably blown.


My God, It's Full Of Code...

    So, here's a subject I don't talk about a whole lot, but it's definitely something I think about, for one reason or other.  This particular thought thread stems from my reading of this article: Intel Capital creates hundred million dollar Perceptual Computing fund.  Now, aside from this reinforcing my belief that it's time for me to go independent, a few things caught my eye.  First, there was the opening statement:

"That’s a lot of money, tech-art fans."

Second, the term "Tech Art" appeared in the Categories list for this article.  So of course I had to click on it and see what other articles fell under that category.  Quite an interesting list, one of them being an article highlighting the release of processing 2.  Being here at Eye-O festival, now somewhat surrounded by people who make art by writing code, really makes me ponder that term "Tech Art" and what a "Tech Artist" really is.  I'm probably not very qualified to speak on what the future of "Tech Art" as a game development discipline is, but ultimately, I'm not really sure there's such a thing as a Tech Artist in games anymore.  Well that's not true, but I definitely think they're becoming fewer and further between.


When code meets art (or at least my feeble attempt)...

    You see, somewhere back up the line, Tech Artists became much more specialized, almost to the point where I'm not sure the title "Tech Artist" was really applicable anymore.  All of a sudden we had riggers, technical animators, dcc tools developers, shader programmers, even physics artist, but to me, a proper Tech Artist was all of these things.  I wrote my first auto-rigging tool in 2002, and I wrote my first Cg (proper Cg, not CgFX) shader not much later, and you know, back then that was the job.  When that "normal mapping" thing started to be whispered in games circles (a lot longer ago than most of you kids think), I was one of the first people to write a normal map extractor from Maya and a Mental Ray shader to test it.  Yep.  And again, that was just the job?  A Tech Artist was rigger, dcc tools programmer, shader writer, fx artist, jack of many different languages, and sometimes even modeler and renderer.  I feel like nowadays, that original diversity and spirit of exploration that defined tech art once is gone, and now the extent of it is finding new ways to solve the same old problem inside whatever tech art sandbox you've chosen.  Sheesh...borrow someone else's solution and use all that free time to learn something NEW, trust me, your pipeline isn't that complex, and your toolchain requirements aren't that special.  Your production process is not a unique delicate flower, for shame.

    I can't really say if the current trend of specialization is going to continue, I imagine it will and people will make the argument that the increasing complexity of AAA game content will require it, but you know, I went from PS2 and low spec PC all the way to the dusk of the 360 and PS3, and I think I chose to work faster and smarter, rather then continue to add complexity to my chosen sandbox (or job security, whichever you want to call it).  I think it's that approach to Tech Art that continues to serve me well in the world of RED, and just to get a little sentimental, it warms my heart to see that original spirit of Tech Art continuing to live on as Creative Coding.


    Andrew Bell said it best at Eye-O last year, TDs (and of course, TAs) are Creative Coders for games and film.  I think this was much more true back in the day (FUCK ME I'M OLD), and I'd like to see Tech Artist return to that original spirit of exploration and diversity, rather than continuing to play "how many ways can i make up to solve the same maya problems everyone else has already solved?".  That said, tomorrow is Eye-O!  Time to shut my mouth, open my eyes, and engage my brain.  This should be awesome.

Monday, June 3, 2013

Eye-O Festival, Day -2

    I think I've aged about 20 years in the last month or so because I feel like I've just gotten super preachy, which is somewhat annoying, though probably less to me and more to the people to whom I've been preaching.  I don't know, I feel like all these thoughts, observations, and opinions have sorta been brewing over the last while and I've decided I need to start recording more of my internal monologues, not that they're any good, but it gives me some talking points if in the future I ever end up talking to anyone who's listening.  So that said, you can probably guess this isn't going to be a very technical post, but hey, I'm at Eye-O!  Trust me, there will be tons of technical musings coming...Plus, I'm going to use a lot of marketing/businessey terms, for which I am also truly sorry...don't hate me, my friends (or do, i suppose).


We deliver all three, yo...

    You get to that point sometimes where you've had a bunch of related conversations with different people and it all adds up to one conversation, or at least, it would be more efficient and probably effective to just have the whole conversation rather than have bits and pieces with different people.  It's definitely been that kind of week/month/year/etc.  I've been thinking, talking, trying to practice, etc what being a rapid experience developer, interaction prototyper, interactivist, whatever you want to call it, etc, and I don't think I've quite succeeded yet.  Most of that is probably due to the fact that I've spent more time being an evangelist, educator, excel jockey, etc, otherwise not really an experience developer.  That said, the one really useful skill I took from my time in the games industry was learning to observe and analyze process, learning what was and wasn't important, and I gotta say I got pretty good at it.  So that said, here are my own thoughts on being a Rapid Experience Developer...(I'm probably 100% wrong).

    I think a big part of this thought thread started quite a while ago (well, as the internet goes anyway) when a friend of mine was pitching a hardware device to me and I kept interrupting and asking what the experience was.  When developing experiences, especially for mainstream consumption, it all starts with the approach.  I've noticed that here in tech-land it's all too easy for us to fall back to things like features and implementation details, or presentation and visual details, you know, the things we're good at, but let's be honest, only the pundits, marketers, and people who need techno-babble to sound intelligent care about individual features, and of those people, an even smaller slice care about anything lower level than that, algorithms and optimization details, for instance.  Now don't get me wrong, I'm a developer/geek (seriously, don't let the powerlifting and MMA fool you, that's just my security blanket) at heart, I can go on about that stuff all day and then a few more, but in the right company at the right time.  So mastering the art of the pitch?  Crucial to rapid experience developers (henceforth, RED).


Everything in its place...

    First off, there's the overall mindset that comes with delivering a successful pitch.  When we realize that we only have a very set amount of time to make people "get it", we really start to focus in on what our overall messaging has to be, so it goes with RED.  Our experience has to communicate its essence to either an uninformed user, or even worse, a user who thinks they're informed, both of which are uphill battles.  Nowadays, most people have...what I'll call a latent knowledge of experiences, that is, we're so inundated with interactive technology that we know what we DON'T like.  If you've ever been in a production job, you know how annoying it is to work with creative leads who pull that stuff (oh, I'll know it when I see it), and while it's acceptable to not put up with that garbage in that situation (I mean really, that's just unprofessional), we can't really hold our target audience to that same standard, so the onus is really on us to...not really know what they want end-to-end, but at least put something in front of them that gets them in.  We don't need to sell someone a product, but we do need to make sure it stays with them (no easy feat given today's short attention spans.  I blame internet.)

    Another crucial element of the pitch process is that it puts us into the role of storytellers, and as any good storyteller knows, we have to be able to connect with our audience.  A big part of that is being able to put ourselves into the mindset of said audience.  You know, in that way, RED is a lot like being an artist, in that the best artists are those who can see through their audience's eyes and know what they'll be looking for/at.  Ok, I know that's a little hippy/new-agey, but I think it's a valid idea, and ultimately, I think it's the closest we're going to get to getting any sort of an indicator as to what our audiences are going to want from our experience (see, again, the onus is on US).  Additionally, telling the experience as a story is a great tool for how to structure the experience overall.  What's the introduction, i.e. what's that hook that's going to get the user engaged initially?  Next, what's the "meat" of the experience, that is, the body of the story?  What is it that's going to keep the user around for a bit?  Lastly, how do we resolve the experience and give the user some impetus to at the very least stay tuned to see what's in store for either the next iteration or the next story we choose to tell?  That's quite a bit to think about, and when we consider we may only have a few weeks to put all this together, well...are we starting to think a little differently about how we approach development?

    The last thing I'll touch on here about the pitch process is that it teaches us really quickly that we CANNOT fall in love with our pitch, our product, and most especially, our process.  The same goes for an experience, especially when it comes to RED.  Now, I realize that strikes a bit counter to what I'd previously said about RED being like art, but make no mistake, while we borrow tenets and process from art, we are NOT making art.  At best, we're creating a beautiful corpse, and at worse, we're creating a trinket or a bauble to fill some space.  Hopefully not too much of the latter, but it will happen, and when that order comes down, crap it out, flush it down the pipe, and get back to what matters.  When we start developing an experience, we've got all these great ideas about all the features we want to include, an all the cool things we're going to write into it, and all the great infrastructure we're going to build, but you know what?  The minute that stuff starts throwing up walls, trash it and move through.  Coding style?  Screw it.  Properly modeled and textured meshes?  Save that noise for polycount.  Here's the question we should be asking ourselves at every step: If this experience were being demoed for 60 seconds (which is probably longer than it will be demoed in actuality), would it totally suffer if I didn't implement this feature that's had me stuck implementing for the last week?  If I were to just fake it, would anyone care?  Answer is probably not, unless it's some sort of interaction model we're trying to work through.  Now, I know at this point someone wants to make the argument that "Presentation Counts!  Visuals Matter!".  That may be true, but I wonder what a little company called Rovio thinks about that, and the same goes for technical details.  You probably get my point, but if you don't let me summarize by paraphrasing Einstein, "visuals, presentation, and code should be as aesthetically pleasing and functional as they need to be, but no more."  Focus on what matters, forget what doesn't, and who cares if you're embarrassed to show someone your code or source files at the end?  Chances are, no one's even going to ask, so...check it in and call it good.


Seriously, just put it in a private repo, i don't wanna know, it's cool

    I think i'll leave this with one of my favorite creative coding projects, Red Paper Heart's Golden Clock.  I like this for so many reasons (Cinder represent!!), but the main reason I like it is because it was developed by four people in 10 days.  And this wasn't a prototype, mind you, this was a mission critical application, in front of hundreds of people, with different degrees of interactivity that had to run the duration of a party with it being the backdrop for the evening's main event!  If this can be done in ten days by four people (albeit four kick ass developers and artists), imagine what one really capable RED could do in a month...There's your brass ring.

A Golden Clock from Red Paper Heart on Vimeo.

Sunday, March 31, 2013

[TUTORIAL] Visualizing Depth in Unity, part 2

    The joys of having a laptop capable of development, I'm seriously in love with my Ultrabook.  This isn't just me shilling for the company, I'm totally sold on this thing.  Apple did right by forcing people to figure out how to build smaller, lighter laptops that still pack serious development punch.  For reference, I'm currently working off of a Gigabyte U2442, would be nice to get something that has a Core i7 CPU, but this one's a Core i5 at 3.1 with a mobile Geforce 6xx, so I'm happy with it.  Made it easy for me to bang out this second depth sample from the comfort of a...actually I think it was a bar as opposed to a coffee shop...


The Technolust, i sorta haz it...

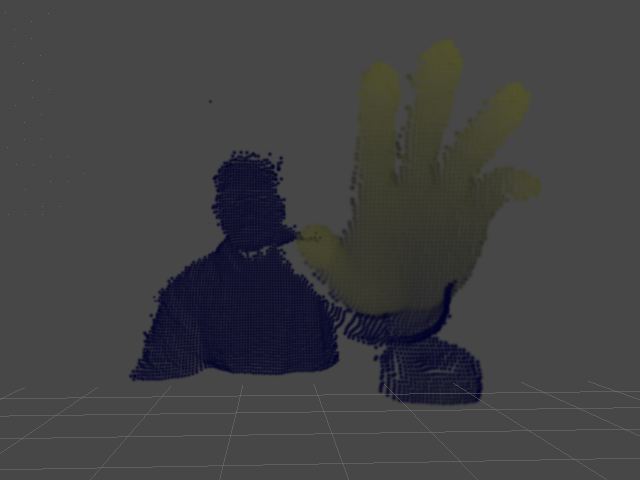
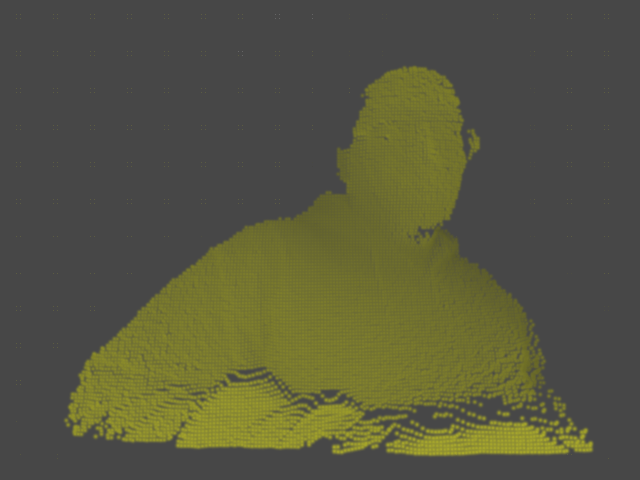
    I mentioned in my last post I'd been messing around with some other methods for visualizing depth from the Creative Camera, I took a few moments after GDC to decompress and finish this one up, it sorta builds off the last sample.  Instead of visualizing a texture, I'm using the depth to set attributes on some particles to get that point cloudy effect that everyone seems to know and love.  This one's a bit more complex, mainly because I added a few parameters to tweak the visualization, but if you've got some Unity under your belt, none of this will be that tricky, and in fact, you'll probably see pretty quickly how setting particle data is very similar to setting pixel data.  I should also note that the technique presented here could apply to any sort of 3d camera, pretty much if you can get an array of depth values from your input device, you can make this work.  So here's what we're trying to accomplish when all's said and coded:


    Since this is a Unity project, we'll need to set up a scene first.  All that's required for this is a particle system, which you can create from the GameObject menu (GameObject > Create Other > Particle System).  Set the particle system's transforms (translate and rotate) to 0,0,0 and uncheck all the options except for Renderer.  Next, set the Main Camera's transform to 160,120,-240, and our scene is ready to go.  That all in place, we can get to coding.  We'll only need a single behavior for this test, which we'll put on the particle system.  I called mine PDepth, but you'll call it Delicious (or whatever else suits your fancy)!  First, let's set up our particle grid and visualization controls:

//We'll use these to control our particle system
public float MaxPointSize;
public int XRes, YRes;

private ParticleSystem.Particle[] points;
private int mXStep, mYStep;

  • MaxPointSize: This controls the size of our particles
  • XRes, YRes: These control the number of particles in our grid
  • points: This container holds our individual particle objects
  • mXStep, mYStep: These control the spacing between particles (this is calculated, not set manually)

    With those in place, we can populate our particle grid and get some stuff on screen.  Here's what our initial Start() and Update() methods should look like:

void Start()
{
    points = new ParticleSystem.Particle[XRes*YRes];
    mXStep = 320/XRes;
    mYStep = 240/YRes;

    int pid=0;
    for(int y=0;y<240;y+=mYStep)
    {
        for(int x=0;x<320;x+=mXStep)
        {
            points[pid].position = new Vector3(x,y,0);
            points[pid].color = Color.white;
            points[pid].size = MaxPointSize;
            ++pid;
        }
    }
}

void Update()
{
    particleSystem.SetParticles(points, points.Length);
}

    If you're wondering where the values 320 and 240 came from, we're making some assumptions about the size of our depth map to set the initial bounds.  Once we add in the actual depth query, we'll fix that and not have to rely on hardcodes.  Otherwise, if all went according to plan, we should have a pretty grid of white particles.  Be sure to set some values for XRes, YRes, and MaxPointSize in the Inspector!  For this example, I've used the following settings:
  • XRes: 160
  • YRes: 120
  • MaxPointSize: 5

    As I mentioned earlier, this procedure actually isn't too much different from the previous sample, in that we're building a block of data from the depth map then loading it into a container object, just in this case we're using an array of ParticleSystem.Particle objects instead of a Color array, and we're calling SetParticles() instead of SetPixels().  That in mind, you've probably already started figuring out how to integrate the code and concepts from the previous tutorial into this project, so let's go ahead and plow forward.  First, well need to add a few more members to our behaviour:

public float MaxPointSize;
public int XRes, YRes;
public float MaxSceneDepth, MaxWorldDepth;

private PXCUPipeline mSession;
private short[] mDepthBuffer;
private int[] mDepthSize;
private ParticleSystem.Particle[] points;
private int mXStep, mYStep;

  • MaxSceneDepth: The maximum Z-amount for particle positions
  • MaxWorldDepth: The maximum distance from the camera to search for depth points
  • mDepthBuffer: Intermediate container for depth values from the camera
  • mDepthSize: Depth map dimensions queried from the camera. We'll replace our hardcoded 320,240 with this

    The only major additions we need to make to our Start() method involve spinning up the camera and using some of that information to properly set up our particle system.  Our new Start() looks like this:

void Start()
{
    mDepthSize = new int[2];
    mSession = new PXCUPipeline();
    mSession.Init(PXCUPipeline.Mode.DEPTH_QVGA);
    mSession.QueryDepthMapSize(mDepthSize);
    mDepthBuffer = new short[mDepthSize[0]*mDepthSize[1]];

    points = new ParticleSystem.Particle[XRes*YRes];
    mXStep = mDepthSize[0]/XRes;
    mYStep = mDepthSize[1]/YRes;

    int pid=0;
    for(int y=0;y<mDepthSize[1];y+=mYStep)
    {
        for(int x=0;x<mDepthSize[0];x+=mXStep)
        {
            points[pid].position = new Vector3(x,y,0);
            points[pid].color = Color.white;
            points[pid].size = MaxPointSize;
            ++pid;
        }
    }
}

    The bulk of the changes are going to be in the Update() method.  The big difference between working with a particle cloud and a texture as in the previous example is that we need to know the x and y positions for each particle, thus the nested loops as opposed to a single loop for pixel data.  This makes the code a bit more verbose, but not a ton more difficult to grok, so let's take a stab at building a new Update() method:

void Update()
{
    if(mSession.AcquireFrame(false))
    {
        mSession.QueryDepthMap(mDepthBuffer);
        int pid=0;
        for(int dy=0;dy<mDepthSize[1];dy+=mYStep)
        {
            for(int dx=0;dx<mDepthSize[0];dx+=mXStep)
            {
                int didx = dy*mDepthSize[0]+dx;

                if((int)mDepthBuffer[didx]>=32000)
                {
                    points[pid].position = new Vector3(dx,mDepthSize[1]-dy,0);
                    points[pid].size = 0.1f;
                }
                else
                {
                    points[pid].position = new Vector3(dx, mDepthSize[1]-dy, lmap((float)mDepthBuffer[didx],0,MaxWorldDepth,0,MaxSceneDepth));
                    float cv = 1.0f-lmap((float)mDepthBuffer[didx],0,MaxWorldDepth,0.15f,1.0f);
                    points[pid].color = new Color(cv, cv, 0.15f);
                    points[pid].size = MaxPointSize;
                }
                ++pid;
            }
        }
        mSession.ReleaseFrame();
    }

    particleSystem.SetParticles(points, points.Length);
}

    So like I said, a bit more verbose, but hopefully not terribly difficult to understand.  A few things to be aware of:

int didx = dy*mDepthSize[0]+dx;

    We use the variable didx as an index into the depth buffer.  The reason we do this is because our particles don't correspond 1:1 to values in the depth buffer, so we use each particle's x and y position to do the depth buffer lookup.  In the next example, we'll take a look at how we can actually have a 1:1 depth buffer to particle setup using generic types.

if((int)mDepthBuffer[didx]>=32000)
{
...
}
else
{
...
}

    Here, the reason we test against a depth value of 32000 is because this is what the Perceptual Computing SDK uses as the error term.  So if the SDK can't resolve a depth value for a given pixel, it sends back 32000 or more.  In this case, if we find an error term, we make the particle really small, but in the next example, we'll look at how we can skip that particle altogether if we have an error value.  Finally, remember we need to implement some sort of range remapping function, I call mine lmap as a homage to Cinder's remap, but you can call it whatever, again, it's basically just:

float lmap(float v, float mn0, float mx0, float mn1, float mx1)
{
    return mn1+(v-mn0)*(mx1-mn1)/(mx0-mn0);
}

    So that's that, in the next sample, we'll look at some different ways to map the depth buffer to a particle cloud and use the PerC SDK's UV mapping feature to add some color from the RGB stream to the particles.  Until then, email me, follow me on Twitter, find me on facebook, or otherwise feel free to stalk me socially however you prefer.  Cheers!


What can i say, i love OpenNI...

Wednesday, March 27, 2013

[TUTORIAL] Depth maps and Ultrabooks

    Went to a really great hack-a-thon this past weekend at the Sacramento Hacker Lab to help coach some folks through working with the Perceptual Computing SDK and got to see some really cool work being done, everything from a next-generation theremin to a telepresence bot, all powered by the Creative 3D Camera and Perceptual Computing SDK.  Does me good to actually get out into the community and see people just dive right in and start building stuff.  Compound that with the GDC Dev Day that personally I think went amazingly well (standing room only at one point!) and it's been a good GDC for Perceptual Computing so far.  But now comes the really hard part, which is that PerC needs to not become a victim of its own success.  As the technology gets into more hands, now it becomes about not burning through goodwill by breaking features, being uncommunicative, or not keeping up with the ecosystem.  But I digress...

    Wanted to share a little Unity tip I got asked about a few times during the hack-a-thon, and that's how to visualize the depth map.  The SDK ships with a sample for visualizing the label map, and visualizing the color map is a fairly trivial change, but visualizing the depth map requires a little bit of doing.  It's actually pretty trivial from a working standpoint, so let's take a look at what's required.

    To get a depth map into a usable Texture2D, the basic flow is:
  • Grab the depth buffer into a short array
  • Walk the array of depth values and and remap them into 0-1 range
  • Store the remapped value in a Color array
  • Load the Color array into a Texture2D
    If that seems really simple, fear not, it actually is, so let's take a look at some code and see how we accomplish this.  Here's a really simple Unity behavior that populates the texture object from the depth map.  I'll leave assigning the texture as an exercise to the readers:

using UnityEngine;
using System.Collections;

public class Test : MonoBehaviour
{
    private PXCUPipeline mSession;
    private int[] mDepthSize;
    private short[] mDepthBuffer;
    private int mSize;

    private Texture2D mDepthMap;
    private Color[] mDepthPixels;

    void Start()
    {
        mDepthSize = new int[2];
        mSession = new PXCUPipeline();
        mSession.Init(PXCUPipeline.Mode.DEPTH_QVGA);
        mSession.QueryDepthMapSize(mDepthSize);
        mSize = mDepthSize[0]*mDepthSize[1];

        mDepthMap = new Texture2D(mDepthSize[0], mDepthSize[1], TextureFormat.ARGB32, false);
        mDepthBuffer = new short[mSize];
        mDepthPixels = new Color[mSize];
        for(int i=0;i<mSize;++i)
        {
            mDepthPixels[i] = Color.black;
        }
    }

    void Update()
    {
        if(mSession.AcquireFrame(false))
        {
            mSession.QueryDepthMap(mDepthBuffer);
            for(int i=0;i<mSize;++i)
            {
                float v = 1.0f-lmap((float)mDepthBuffer[i],0,1800.f,0,1.f);
                mDepthPixels[i] = new Color(v,v,v);
                mDepthMap.SetPixels(mDepthPixels);
                mDepthMap.Apply();
            }
            mSession.ReleaseFrame();
        }
    }

    float lmap(float val, float min0, float max0, float min1, float max1)
    {
        return min1 + (val-min0)*(max1-min1)/(max0-min0);
    }
}

    So like i said, fairly simple, albeit verbose technique, but should be fairly easy to wrap it up into a simple function for quick future use.  This same technique can also be used to visualize the IR map with some very minor tweaks.  I've actually been doing alot of stupid depth map tricks the last few days.  I'm at GDC all this week so I'm not sure how much dev time I'll get to be able to polish a few more of these up but maybe the weekend'll afford me some cycles if i'm not in full on crash out recovery mode...

Friday, March 1, 2013

Milestone presents!

    5000 pageviews for me just ranting is pretty cool, so have some surprise processing code!  I won't tell you what it does, basically it came out of a Unity UI experiment Annie's been working on and my desire to learn how processing's PVector interface really works.  Found some interesting quirks, tho having more to do with 2d and 3d and PVector being a 3d construct vs PVector's implementation, i'm going to say (since Shiffman's a genius and probably knows what he's doing).  Anyway...have fun (and send Annie a hey if you end up using this code for something)!  If it's any hint, i call this "Spider Silk"...(poetic, no?)

float thresh = 0.5;
//world vectors
PVector v_ctr_w = new PVector(0,0);
PVector v_0_w = new PVector(0,0);
PVector v_1_w = new PVector(0,0);

//image vectors
PVector v_ctr_i = new PVector(0,0);
PVector v_0_i = new PVector(0,0);
PVector v_1_i = new PVector(0,0);

void setup()
{
  size(500,500,P2D);
  stroke(128);
}

void draw()
{
  background(0);
  v_ctr_i.set(map(v_ctr_w.x,-1,1,0,width),map(v_ctr_w.y,-1,1,0,height),0);
  v_0_i.set(mouseX,mouseY,0);
  v_0_w.set(map(v_0_i.x,0,width,-1,1),map(v_0_i.y,0,height,-1,1),0);
  
  line(v_ctr_i.x,v_ctr_i.y,v_0_i.x,v_0_i.y);
  ellipse(v_ctr_i.x,v_ctr_i.y,50,50);
  fill(0);
  ellipse(v_0_i.x,v_0_i.y,30,30);
  
  fill(255);
  if(v_0_w.mag()<thresh)
    v_1_w.set(v_0_w.x,v_0_w.y,0);
  else
    v_1_w = PVector.mult(v_0_w,thresh/v_0_w.mag());

  v_1_i.set(map(v_1_w.x,-1,1,0,width),map(v_1_w.y,-1,1,0,height),0);
  ellipse(v_1_i.x,v_1_i.y,15,15);  
}

void mousePressed()
{
  thresh = v_0_w.mag();
}

Sunday, February 24, 2013

A little time to breathe...

    First time in a while i've felt like i had a Sunday morning, not sure why that is, but it's nice to have a little room to do some random. Thought I'd just take a moment and touch on some of the things I've been working on, mainly to gloat about all the cool shit I'm doing.  No, no that's not true, honestly professional life has taken a tiny bit of a turn in that I'm pretty much heading fully down the management track now and am relegating myself to weekend code warrior.  This is all totally by choice, mind you, because if I've come to realize anything in the last year it's that i REALLY love software arting, like, in a bad, unnatural way.  No, that's also not true, at least the last part.  After 10+ years, I think i'm just burned out on industrial strength development for money in general, just because there are specific things I like doing with code, and I'm probably not going to get to do those things unless I start my own company (prospective employers and recruiters, take not).  I think I've also gotten to the point in my career where I feel like I've amassed enough knowledge and experience to be a pretty good teacher, which in a weird way has brought me back around to management.


Hear me out, seriously...

    To me, management done properly is very much about facilitating, mentoring, and sheltering the team, which, if you think about it, parallels teaching a bit (actually, when I think about it, it also parallels parenting a bit, maybe I'm just getting to that age where I'm wanting to have kids...no, no, that's a terrifying thought).  No, I've always liked the idea of teaching, for which I blame my family.  There are quite a few good teachers/educators, in fact, now that I think about it, EVERYONE on my mom's side of the family are teachers.  It's not so much the power and ego trip of having the authority or getting attention and letting the world know how smart i am, i just like it when knowledge is shared.  In my old age, i'm getting less and less ok with the idea of making money off of ideas.  Sure, you have to start with an idea, but nowadays especially, too many people get so far with the idea and don't take it through.  I put code on github on a fairly regular basis, code that some people consider potential ip, but man, it's just not.  It's just knowledge waiting to be re-applied.  Something we all need to keep in mind, methinks.

Coding For Creative Non-Coders
    So i've gotten a few questions about Coding For Creative Non-Coders (which is weird that people were actually even paying attention to that) and the short is, it's not dead (just dreaming).  I've had the opportunity to present the curriculum in a few different live venues, which means I'm focusing on cleaning it up and getting it presentable to a live audience.  Means it'll be a while before it's actually published here, but it also means that by the time it gets here there'll be a ton more content and it'll all flow together a bit more.  One of the issues that bothered me about the curriculum initially was that it didn't really go anywhere, it sorta stopped at putting random things on screen with processing.  The new, refocused curriculum deals with visualizing social networking data, so we'll go from not knowing much about coding at all to being able to scrape web services for data and displaying said data.  Cool eh?  So if you were watching, waiting, wondering, i apologize for taking it dark like that, but rest assured, it'll be worth it, methinks.  If you're in the bay area, keep watching the GAFFTA website for more details on the class, and feel free to pop in!

teaser

Cindering and Other Creative Coding
    Dunno if anyone found my Cinder rantings at all useful (probably not), but if you did, fear not, more of those are on the way as well.  I'm pretty much deep into development at this point, churning on content for GDC, workshops, and a new SDK release, which means when i'm not managering, i'm coding pretty fiercely, and haven't taken the time to stop and do proper writeups like i should.  Hopefully the code will be self-documenting enough, though I do plan on releasing some sort of documentation for certain projects (Cinder block, ofx addon, Unity samples, etc).  Basically, useful code is on the way, so fear not.  If all goes according to plan, everything should line up with the SDKs Gold Release, which is...well, soon.

Thinking, Thinking
    About pretty much everything.  As i type this, i have a window open with a linkedin message to a google recruiter in a somewhat unfinished state.  I don't really want to work for google, in fact, after Intel i really don't want to work for anyone but me anymore on smaller, project based contracts.  It was actually my initial contact with google that got me thinking about that because they didn't really have a job for me, it was more that they think they like my skillset, or at least what they can tell of it from paper.  So it's probably the case of they just want to bring on engineering resources, then assign them to projects, or even more, the oft-romanticized work on whatever project interests you, made popular by such groups as Valve (wonder how that worked for the crew they just laid off...).  I notice alot of people think that sort of environment is fairly attractive, but if i've learned anything about my work habits, it's that i REALLY like projects.


...always looking towards some horizon, i suppose...

    Ultimately, I'd rather be hired because someone saw my body of work and thougth that was attractive, rather than a few lines under the "Skills" heading on a website.  I'm actually considering removing specific languages from my LinkedIn profile and just adding frameworks, SDKs, APIs, environments, etc.  I imagine that would blow some recruiter's mind pretty hard, but the flipside is i would probably get approached by people who really wanted to work with me on things I was really interested in working on.  Might be an interesting experiment.

    Experiment...that's another incredibly relevant descriptor.  I think my whole time at Intel is going to be a series of experiments, from proving some ideas I have about project management to going from tech artist to UX Developer/Project Manager.  It's daunting but exciting at the same time, I think my limited experience managing Tech Artists is probably going to be a big help when it comes to managing the crew i'm working with right now.  I say i'd never go back to game development, but who knows?  If my ideas turn out to be correct, might be fun to do some indie development.  Dunno tho, i think any game i made wouldn't do too well because after Intel, i don't think i could adhere to the established input modalities that games seem to be comfortable with.  Ah well, UX Development Manager it is, I suppose.  For now.

Wednesday, January 30, 2013

[CODE] simple bullet physics debug draw for Cinder


    Not horribly hard to figure out but if you feel like saving yourself some code time or just looking for a quick jumping off point, here you go.  You can also grab the whole project from github.  If this looks like a straight port of bullet's GLDebugDrawer, it pretty much is.

.h
#include "cinder/app/AppBasic.h"
#include "cinder/gl/gl.h"
#include "cinder/Text.h"
#include "btBulletDynamicsCommon.h"
#include "LinearMath/btIDebugDraw.h"

using namespace ci;
using namespace ci::app;
using namespace std;

class CibtDebugDraw : public btIDebugDraw
{
    int m_debugMode;
public:
    CibtDebugDraw();
    virtual ~CibtDebugDraw();
    virtual void drawLine(const btVector3& from, const btVector3& to, const btVector3& fromColor, const btVector3& toColor);
    virtual void drawLine(const btVector3& from, const btVector3& to, const btVector3& color);
    virtual void drawSphere(const btVector3& p, btScalar radius, const btVector3& color);
    virtual void drawBox(const btVector3& bbMin, const btVector3& bbMax, const btVector3& color);
    virtual void drawContactPoint(const btVector3& PointOnB, const btVector3& normalOnB, btScalar distance, int lifeTime, const btVector3& color);
    virtual void reportErrorWarning(const char* warningString);
    virtual void draw3dText(const btVector3& location, const char* textString);
    virtual void setDebugMode(int debugMode);
    virtual int getDebugMode() const;
};

.cpp
CibtDebugDraw::CibtDebugDraw() : m_debugMode(0)
{
}

CibtDebugDraw::~CibtDebugDraw()
{
}

void CibtDebugDraw::drawLine(const btVector3& from, const btVector3& to, const btVector3& fromColor, const btVector3& toColor)
{
    gl::begin(GL_LINES);
    gl::color(Color(fromColor.getX(), fromColor.getY(),
        fromColor.getZ()));
    gl::vertex(from.getX(),from.getY(),from.getZ());
    gl::color(Color(toColor.getX(), toColor.getY(), toColor.getZ()));
    gl::vertex(to.getX(),to.getY(),to.getZ());
    gl::end();
}

void CibtDebugDraw::drawLine(const btVector3& from, const btVector3& to, const btVector3& color)
{
    drawLine(from,to,color,color);
}

void CibtDebugDraw::drawSphere(const btVector3& p, btScalar radius, const btVector3& color)
{
    gl::color(Color(color.getX(), color.getY(), color.getZ()));
    gl::drawSphere(Vec3f(p.getX(),p.getY(),p.getZ()), radius);
}

void CibtDebugDraw::drawBox(const btVector3& bbMin, const btVector3& bbMax, const btVector3& color)
{
    gl::color(Color(color.getX(), color.getY(), color.getZ()));
    gl::drawStrokedCube(AxisAlignedBox3f(
        Vec3f(bbMin.getX(),bbMin.getY(),bbMin.getZ()),
        Vec3f(bbMax.getX(),bbMax.getY(),bbMax.getZ())));
}

void CibtDebugDraw::drawContactPoint(const btVector3& PointOnB, const btVector3& normalOnB, btScalar distance, int lifeTime, const btVector3& color)
{
    Vec3f from(PointOnB.getX(), PointOnB.getY(), PointOnB.getZ());
    Vec3f to(normalOnB.getX(), normalOnB.getY(), normalOnB.getZ());
    to = from+to*1;

    gl::color(Color(color.getX(),color.getY(),color.getZ()));
    gl::begin(GL_LINES);
    gl::vertex(from);
    gl::vertex(to);
    gl::end();
}

void CibtDebugDraw::reportErrorWarning(const char* warningString)
{
    console() << warningString << std::endl;
}

void CibtDebugDraw::draw3dText(const btVector3& location, const char* textString)
{
    TextLayout textDraw;
    textDraw.clear(ColorA(0,0,0,0));
    textDraw.setColor(Color(1,1,1));
    textDraw.setFont(Font("Arial", 16));
    textDraw.addCenteredLine(textString);
    gl::draw(gl::Texture(textDraw.render()),
        Vec2f(location.getX(),location.getY()));
}

void CibtDebugDraw::setDebugMode(int debugMode)
{
    m_debugMode = debugMode;
}

int CibtDebugDraw::getDebugMode() const
{
    return m_debugMode;
}

Here's a quick shot of the debug drawer in action with a single body:

Sunday, January 27, 2013

[TUTORIAL] Getting tweets into Cinder


    Hmm...the notion of "getting something into Cinder" may be a bit of a misnomer, but then, you are pulling data into a framework/environment, so maybe it is.  Ah well, point being we're moving on from the previous installment wherein we walked through the steps required to build the twitcurl library so we could tweet in C++.  Now we need to actually use the darn thing, yeah?  So let's get to...err...Tweendering? (Cindweeting?  Cindereeting?  Sure, ok).  I'm assuming we all know how to use Tinderbox to setup a Cinder project, if not, just hit up <your cinder root>\tools\TinderBox.exe, it's pretty self-explanatory after that.    Here we gooo...

1.a) Once we've got an initial project tree, let's move some files and folders around to make setting up dependencies a bit simpler. Starting from <your cinder project root>, let's make our project tree look something like this (completely optional):

assets/
include/
  twitcurl.h
  oauthlib.h
  curl/
    (all the curl headers)
lib/ <-- add this folder manually
  libcurl.lib
  twitcurl.lib
resources/
src/
vc10/
  afont.ttf

Given this tree, setting up the rest of the dependencies for the project should be pretty straightforward.  I should point out that putting the font file directly into the vc10 folder is a bit of a hack and not at all the proper way to set up a Cinder resource, but for now I just want to get something functional.  Much respect to the Cinder team for their solution to cross-platform resource management though, I'll probably cover that once we start getting into building the final project.  Feel free to do some independent study, though, and check out the documentation on Assets & Resources in Cinder (and send me a pull request if you do!). 

1.b) So...let's code (and test out the new style sheet I wrote for syntax-highlighting)!  If you're interested in taking a peek at what the finished result might look like, check out the web version of Jer Thorp's tutorial, and if you're reading this Jer, no disrespect, I'm totally not meaning to steal your work for profit or some nefarious purpose, it's just a great, simple example that's super straightforward and easy to understand.  Had to get that off my chest, all credit where it's due.  If you haven't checked out the original tutorial, it goes (a little something) like this:

1) Do a twitter search for some term, we'll use "perceptualcomputing"
2) Split all the tweets up into individual words
3) Draw a word on screen every so often at a random location
4) Fade out a bit, rinse, repeat steps 3 and 4

1.c) Easy-peasy!  'Right, so first we need to get some credentials from twitter so we can access the API.  Not a hard process, just login to Twitter Developers, go to My Applications by hovering over your account icon on the upper-right, then click the Create a new application button, also on the upper-right.  Fill out all the info, then we'll need to grab a few values once the application page has been created.  The Consumer Key and Consumer Secret at the top of the page are the first two values we'll need, then we'll scroll down to the bottom of the page, click the Create Access Token button, and grab the Access Token and Access Token Secret values.  For now we'll just stick these in a text file somewhere for future reference.

1.d) Finally the moment we've all been waiting for, getting down with cpp (yeah you know m...ok, ok that's enough of that).  As with most C++ projects, we'll start with some includes and using directives:

#include <iostream>
#include "cinder/app/AppBasic.h"
#include "cinder/gl/gl.h"
#include "cinder/gl/TextureFont.h"
#include "cinder/Rand.h"
#include "cinder/Utilities.h"
#include "json/json.h"
#include "twitcurl.h"

using namespace ci;
using namespace ci::app;
using namespace std;

Outside of the normal Cinder includes, we'll be using Rand and TextureFont to draw our list of tweet words on screen, and we'll be using Utilities, twitcurl, and json to fetch, parse, and set up our twitter content for drawing.

1.e) Let's set up our app class next, should be no surprises here:

class TwitCurlTestApp : public AppBasic
{
public:
    //Optional for setting app size
    void prepareSettings(Settings* settings);

    void setup();
    void update();
    void draw();

    //We'll parse our twitter content into these
    vector<string> temp;
    vector<string> words;

    //For drawing our text
    gl::TextureFont::DrawOptions fontOpts;
    gl::TextureFontRef font;

    //One of dad's pet names for us
    twitCurl twit;
};

Ok, so I may have lied just a tiny bit.  If you're coming from the processing or openFrameworks lands, notice we need to do a little bit of setup before drawing text, but it's nothing daunting.  We'll see this a bit with Cinder as we get into more projects, there's a little more setup and it does require a little bit more C++ knowledge to grok completely, but it's nothing that should throw anyone with even just a little scripting experience.  That said, a little bit of C++ learnings can never hurt.

1.f) Time to implement functions!  If we're choosing to implement a prepareSettings() method, let's go ahead and clear that first.  For this tutorial, I'm going with a resolution of 1280x720, so:

void TwitCurlTestApp::prepareSettings(Settings* settings)
{
    settings->setWindowSize(1280, 720);
}

1.g) Onward!  Let's populate our setup() method now.  The first thing we'll want to do is setup our canvas and drawing resources, which means loading our font and setting some GL settings so our effect looks cool-ish:

gl::clear(Color(0, 0, 0));
gl::enableAlphaBlending(false);
font = gl::TextureFont::create(Font(loadFile("acmesa.TTF"), 16));

1.h) Now it's time to warm up the core, or I guess you could we could call it setting up our twitCurl object, so let's get out those Consumer and Access tokens and do something with them:

//Optional, i'm locked behind a corporate firewall, send help!
twit.setProxyServerIp(std::string("ip.ip.ip.ip"));
twit.setProxyServerPort(std::string("port"));

//Obviously we'll replace these strings
twit.getOAuth().setConsumerKey(std::string("Consumer Key"));
twit.getOAuth().setConsumerSecret(std::string("Consumer Secret"));
twit.getOAuth().setOAuthTokenKey(std::string("Token Key"));
twit.getOAuth().setOAuthTokenSecret(std::string("Token Secret"));

//We like Json, he's a cool guy, but we could've used XML too, FYI.
twit.setTwitterApiType(twitCurlTypes::eTwitCurlApiFormatJson);

Hopefully this all makes sense and goes over without a hitch.  Never a bad idea to scroll through everything and look for the telltale red squiggles, or if you're lazy like me, just hit the build button and wait for errors.


    Since we're only going to be polling twitter once in this demo, we'll do all of our twitter queries in the setup() method as well.  Let's take a look at the main block of code first, then we'll go through the major points:

if(twit.accountVerifyCredGet())
{
    twit.getLastWebResponse(resp);
    console() << resp << std::endl;
    if(twit.search(string("perceptualcomputing")))
    {
        twit.getLastWebResponse(resp);

        Json::Value root;
        Json::Reader json;
        bool parsed = json.parse(resp, root, false);

        if(!parsed)
        {
            console() << json.getFormattedErrorMessages() << endl;
        }
        else
        {
            const Json::Value results = root["results"];
            for(int i=0;i<results.size();++i)
            {
                temp.clear();
                const string content = results[i]["text"].asString();
                temp = split(content, ' ');
                words.insert(words.end(), temp.begin(), temp.end());
            }
        }
    }
}
else
{
    twit.getLastCurlError(resp);
    console() << resp << endl;
}

    This code should read pretty straightforward, there are really just a few ideas we need to be comfortable with to make sense of things:

1) Both Jsoncpp and twitcurl follow a similar paradigm (which pops up in a lot of places, truth be told) wherein we get a bool value back depending on the success or failure of the call.

2) The pattern for using twitcurl is a) make a twitter api call b) if successful, .getLastWebResponse(), if not .getLastCurlError().

3) There are a few different constructors for Json::Value, but for our purposes the default is sufficient.

4) Json members can be accessed with the .get() method or via the [] operator, es.g. jsonvalue.get("member",default), jsonvalue["member"].  I'm just using the [] operator, but either one seems to work.

That all in mind, let's walk through that last block a chunk at a time.

2.a) First, we need to make sure we can successfully connect to the twitter API, and here we see the twitcurl pattern in action.  .accountVerifyCredGet() "logs us in" and verifies our consumer and access keys, then returns some info about our account.  If all went according to plan (unlike the latest reincarnation), we should see the string representation of our jsonified twitter account info in the debug console:

if(twit.accountVerifyCredGet())
{
    twit.getLastWebResponse(resp);
    console() << resp << endl;

console() returns a reference to an output stream, provided for cross-platform friendliness.  Just think of it as Cinder's cout.

2.b) Now the fun stuff, let's get some usable data from twitter.  We'll do a quick twitter search, then get a json object from the result, provided everything goes well (from here on out, let's just assume that happens, if something goes horribly awry, email me and we'll work it out):

    if(twit.search(string("perceptualcomputing")))
    {
        twit.getLastWebResponse(resp);

        Json::Value root;
        Json::Reader json;
        bool parsed = json.parse(resp, root, false);

        if(!parsed)
        {
            console() << json.getFormattedErrorMessages() << endl;
        }

Hopefully nothing too hairy here, there's that twitcurl pattern again.  We do our search with our term of choice (note this could be a hashtag or an @name too), catch the result into a string, then call our json reader's parse() method.  The false argument for parse() just tells our reader to toss any comments it comes across while parsing the source string.  In this case, since we know what keys we're looking for, it's probably not a big deal, but if we were ever in a situation where we were going to have to query all the members to find something specific, having less noise might be a good thing.

2.c) Ok, since for the duration of this tutorial we're living in a perfect world, everything went according to plan, there were no oauth or parsing errors, and now we have a nice, pretty json egg ready to be cracked open and scrambled.  Let's get our tweets, split them up, and stash them in our string vector, then we'll be ready to make some art.

        else
        {
            const Json::Value results = root["results"];
            for(int i=0;i<results.size();++i)
            {
                temp.clear();
                const string content = results[i]["text"].asString();
                temp = split(content, ' ');
                words.insert(words.end(), temp.begin(), temp.end());
            }
        }
    }
}

Again, nothing crazy here, in fact I'm sorta starting to feel bad for making people read this since i'm not doing any crazy 3d, shadery, lighting, particle, meshy awesomeness, it's just simple parsing operations...Ah well, the sexy bullshit (as the good Josh Nimoy calls it) is coming, I promise.  One of the things to be aware of here is that Json::Value is really good about parsing data into the proper types for us.  As I mentioned earlier, the docs present a few different constructors, but we're not using any of those here.  Querying the "results" key (which contains all of our search results) gives us back a list we can iterate through in fairly simple order.  So all we do is parse that, then for every element in our array, we get its "text" key, which contains the actual body of a tweet.  Lastly, we take that text and use Cinder's built-in string splitter, which should be quite familiar to you if you've ever split a string in a different language.


    Looks like all we have left is to make some stuff happen on-screen, so same as we did with the setup() method, let's take a glance at the code first, then we'll break it down, although if you're already familiar with Cinder, there probably won't be anything new here...

void TwitCurlTestApp::draw()
{
    gl::color(0, 0, 0, 0.015f);
    gl::drawSolidRect(Rectf(0, 0, getWindowWidth(), getWindowHeight()));

    int numFrames = getElapsedFrames();
    if(numFrames%15==0)
    {
        if(words.size()>0)
        {
            int i = numFrames%words.size();

            gl::color(1, 1, 1, Rand::randFloat(0.25f, 0.75f));
            fontOpts.scale(randFloat(0.3f, 3.0f));
            font->drawString(words[i],
                Vec2f(Rand::randFloat(getWindowWidth()),
                    Rand::randFloat(getWindowHeight())),
                fontOpts );
        }
    }
}

3.a) No messing around, let's get right to it.  If you've ever done anything in processing, you're probably familiar with the technique we're implementing with these two lines of code to fade the foreground a bit between frames, i.e. set the fill color to black with some amount of transparency and draw a rectangle the size of the screen.

    gl::color(0, 0, 0, 0.015f);
    gl::drawSolidRect(Rectf(0, 0, getWindowWidth(), getWindowHeight()));

3.b) The last step then, is to draw some words to the screen.  We'll grab a new word every 15 frames, set the fill color to white (also with some amount of transparency), scale the font by a random amount, and draw the word to a random location in the window. 

    int numFrames = getElapsedFrames();
    if(numFrames%15==0)
    {
        if(words.size()>0)
        {
            int i = numFrames%words.size();

            gl::color(1, 1, 1, Rand::randFloat(0.25f, 0.75f));
            fontOpts.scale(Rand::randFloat(0.3f, 3.0f));
            font->drawString(words[i],
                Vec2f(Rand::randFloat(getWindowWidth()),
                    Rand::randFloat(getWindowHeight())),
                fontOpts );
        }
    }
}

At this point, we should be able to build/run the project and hopefully see something similar to this:


If something has gone horribly awry, send me an e-mail or hit me up on github.  I've put the project up on github as well, but be advised you may have to change some of the project settings to reflect your own build environment.  For the scope of my project, I've got quite a bit more twitter to learn, including how to manage tweets, maybe how to deal with the streaming API, and a few other things, but that's all down the road.  Next up:

Wednesday, January 16, 2013

building twitcurl in visual studio 2010

UPDATE 20130122.1330: Verified this build chain does let you query twitter from Cinder, that being the goal.  Yeah, yeah, i should've tested that too;P  I don't have a really fun tutorial yet, just printing to the app::console(), but yeah, it works, so go forth and...uhh...twinderifiy?

    If you're wondering where the next round of C4CNC is, fear not, the manuscript is actually done and waiting to get some design and formatting love.  I wasn't kidding when I said this is probably a bad time to embark on a project that required some time and attention, but I'm committed to delivering on that.  Just got back from a great weekend of openFrameworkshops with Reza Ali and Josh Nimoy at GAFFTA, so i'm...not charged, but definitely refreshed and ready to keep cranking on creative coding related work, and especially C++ work.  I've really been dragging my feet on C++, but this year we're doing it live.  Seriously, my brain is so full of things i want to explore, prototype, visualize, maaaan...


    To that end, it's time to get cracking on an installation for GDC, my favorite time of year. Hopefully since I'm getting started sooner on this than I did for my ill-fated CES installation attempts, this one will go all the way. We've decided to do a twitter visualizer, and since I've decided that this year I'd like to do much more work in C++, I'm going with Cinder (of course).

    The first bump-in-the-road I came across is the lack of any official C++ support for twitter, but there are a few different twitter c++ libraries that have been written by various external parties. I've settled on twitcurl because it seems like the lightest, most straightforward version. The current download doesn't support Visual Studio 2010 though, which means the whole dependency chain needs to be rebuilt. It's not a terribly hard process, but there aren't a ton of good directions on the website, and in fact I got more out of the directions for building and using libcurl. I'm going to try and present a condensed version here, mainly for my own reference if I have to do this again, but also for anyone else trying to get up and running with C++/twitter in short order.


    I'm going to assume you've got some experience setting up Visual Studio projects, so I'm not going to go too deep into the specifics of that. First up, we need to grab the source distros:

openssl - Download (1.0.1c is latest as of this writing)
libssh2 - Download (1.4.3 is latest as of this writing)
libcURL - Download (7.28.1 is latest as of this writing)
twitcurl - Checkout SVN

    Now before we get down to business, I'm going to recommend a little bit of housekeeping.  These projects are all rather noisy, i.e. there are a lot of folders, a lot of files, solutions, workspaces, and support files for different IDEs, and...well you get the idea.  This may be 101 for some folks, but it's worth jotting down.  I've set my folder structure up so, feel free to adopt this or something similar (or ignore completely):

CPP/
  libs/
    src/
      curl-7.28.1/
      libssh2-1.4.3/
      libtwitcurl/
      openssl-1.0.1c/
    build/
      libcurl/
        include/
        lib/
          Debug/
          Release/
      libssh2/
        include/
        lib/
          Debug/
          Release/
      libtwitcurl/
        include/
            curl/
        lib/
          Debug/
          Release/
      openssl/

    Again, this is really just a suggestion based on how i store all my libraries on my machine, it's just for convenience.  That all in place, let's get to building some dependencies.

    All the directions are taken from the following document, which I HIGHLY recommend reading.  There are some really important points here that make all the difference between odd linker errors and not.

openssl


1) Install Perl.  I used ActivePerl, but any distribution should be sufficient, really you just need it to run some build configuration scripts.  The doc also recommends using NASM, but I haven't seen any disadvantage of not using it.  That said, I can't really comment, because I haven't seen the advantages of using it either.

2) Open a Visual Studio command line and switch over to your openssl source root directory. You may need to add perl to your path, which you can do by issuing the command:

path=%PATH%;<your perl executable folder>

3) Now we can configure and kick off our build. Issue the following commands (there'll be a pause in between as the scripts run):

perl Configure VC-WIN32 --prefix=<your openssl build path's root>
ms\do_ms
nmake -f ms\nt.mak
nmake -f ms\nt.mak test
nmake -f ms\nt.mak install

<your openssl build path's root> should be just that, the root folder of your desired openssl build with forward slashes.  In fact, if you jump back up and look at how I've laid out my folder, you'll see I have no folders under my openssl folder by design.  This is because the openssl build process creates include, lib, and a few other folders for you.  Also, pay close attention to the output of the test step, you shouldn't see any errors, but if you do, retrace your steps and try the build again.

From here on out, it's all in Visual Studio, so let's get the rest of our libraries built. So long, command line environment!

libssh2


1) Open the Visual Studio project, located at <your libssh2 source root>\win32\libssh2.dsp and take the project through the Visual Studio 2010 conversion process.

2) Now we need to configure the LIB Debug build configuration.  We need to add openssl as a dependency, so first, add the path to the openssl include folder to the C/C++ > General > Additional Include Directories.

3) We also need to set the C/C++ > Code Generation > Runtime Library option to Multi-threaded Debug (MTd).  This is easily the most important step in the whole process, every other project will need to have this set, or you'll get some weird linker errors.

4) Next, we need to add the openssl libraries to our linker dependencies.  Add libeay32.lib and ssleay32.lib to the Librarian > General > Additional Dependencies field; Be sure to also add <your openssl build root>\lib to the Librarian > General > Additional Library Directories field.

5) The last bit of configuration is to set the Librarian > General > Output File field to wherever you'd like the final lib file to end up.  In my case, the value is lib\build\libssh2\lib\Debug\libssh2.lib.  Be sure to configure the LIB Release configuration as well. The steps are all the same, save the output file settings.

6) Build the project and ignore the LNK4221 warnings, they won't affect anything here.

Whew!  Halfway done, now comes the main event, libcurl.  Twitcurl and any projects you build with twitcurl depend on this, so let's plow through and get tweeting from C++ (and Cinder (or ofx, or whatever your C++ framework of choice be)).


bro::comeAt(&me);

libcurl


1) For libcurl, we need to setup libssh2 as a dependency, so open the Visual Studio project <your curl source root>\lib\libcurl.vcproj and add the include path, the library, and the library path for your libssh2 build to the appropriate fields.

2) Remember to also set the C/C++ > Code Generation > Runtime Library to Multi-Threaded Debug (MTd) and stay odd linker error free!

3) libcurl requires a few preprocessor definitions.  To set these up, open the C/C++ > Preprocessor > Preprocessor Definitions window and copy-paste the following block below the existing definitions:

CURL_STATICLIB
USE_LIBSSH2
CURL_DISABLE_LDAP
HAVE_LIBSSH2
HAVE_LIBSSH2_H
LIBSSH2_WIN32
LIBSSH2_LIBRARY

4) If you've setup a custom folder structure, remember also to set your output file settings to wherever you'd like libcurl to sit after it gets built.

5) Hit build and you should be good to go.  All that's left now is to build twitcurl and you'll (we'll, i'll) be tweeting in style, because C++ never goes out of style.  Weird style fads and convoluted paradigms might, but that's a whole other conversation.

twitcurl


The twitcurl project page and wiki are a little odd and convoluted, so I would say those may not the best places to go for information on the project.  Probably a good idea to just checkout the source and make like Kenobi talking to storm troopers talking to Kenobi...(yo, dawg)


1) We'll need to do a little more housekeeping, this time with the twitcurl source.  In the <your twitcurl source root>\libtwitcurl folder, you'll see two subfolders, curl and lib. These folders contain the libcurl dependencies for twitcurl, but as we mentioned earlier, these are out of date.  At this point, we can take a few different approaches.  The end goal is to replace the existing libcurl dependencies with the ones we built previously, so we can replace the contents of the curl and lib folders with the contents from our libcurl build, or we can ignore these and change the project configurations. I chose to change the project configurations so I wouldn't have duplicates floating around.  Ultimately, we're going to need to change some configuration settings anyway, so I'm not sure there's much value in keeping the old dependencies around.

2) Once we've got a plan of action (keep,delete,etc), let's pop open libtwitcurl/twitcurl.sln in Visual Studio and replace all the references to curl with the paths to our previously built libcurl.  We need to update a few fields with the relevant info:

C/C++ > General > Additional Include Directories
Librarian > General > Additional Dependencies
Librarian > General > Additional Library Directories
Librarian > General > Output File (optional)
Librarian > General > Additional Dependencies (also add ws2_32.lib to this field)

3) Next, let's not forget to set the C/C++ > Code Generation > Runtime Library to...Yep, Multi-threaded Debug (MTd).

4) Lastly, let's add CURL_STATICLIB to C/C++ > Preprocessor > Preprocessor Definitions and build the project. If everything's setup correctly and all your previous builds of the dependency chain succeeded, congrats!  You now have everything you need to send tweets in C++.  Take a moment and be awesome (or keep being awesome if you already are)!


    So now it's pretty much just using twitcurl in a project.  Building the included twitterClient is pretty simple, we just need to:

1) Add our builds of libtwitcurl and libcurl as dependencies
2) Add ws2_32.lib as a dependency
3) Add the CURL_STATICLIB Preprocessor Definition
4) Set the C/C++ > Code Generation > Runtime Library option to...whaaaat?
5) Build that muthah (out).  We'll need to change some of the URLs in the project, but otherwise it should be a straight ahead process.

    Step one down, and trust me when I say this is monumental.  If I learned anything from this process it's RTFM!!!  TWICE!!!!  I had the hardest time getting things to build because I glossed over a step here and there and didn't read all the little details about what settings needed to be which specifically.  But that's all behind us now, so next we need to get tweeting from Cinder.  For the next segment, I'll probably recreate Jer Thorp's twitter and processing tutorial in Cinder just to get up and running.  Stay Tuned!